
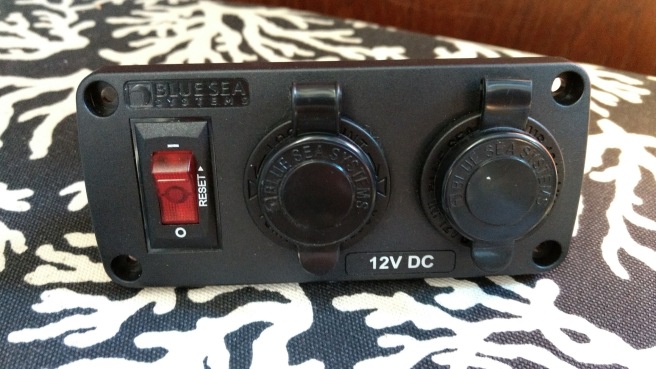
Because we all know phones are life for us Millennials, this is the second DYI project. I picked up a DC outlet with two USB chargers from Trotac Marine in Victoria for about $60. This install is pretty straightforward, requiring you to run a positive and negative connection to the battery, and that’s it.
Tools You’ll Need:
- Wire-strippers
- Heat gun
- Electrical Tape
- Ring Terminals
- Quick Disconnect Wire Connectors
- Electrical Wire
- Drill
- Reciprocating Saw (Sawzall)
The Installation
- Decide where you’re going to install your outlet. I chose right above the battery to minimize the distance I’d need to run wires. I also picked somewhere with wood because I am over picking fibreglass slivers out of my poor hands. After a suitable location has been chosen, you’ll need to prepare it. In my case, this meant drilling a bunch of holes and then using the saw to cut out an outlet-shaped hole.

Fig 2: Fulfilling all my childhood dreams of drilling holes in things 2. Once the outlet hole is cut, you can connect your electrical wire to it and run the wire to the battery. As with all electrical work, ensure you connect to power last, you wear appropriate protective equipment like rubber gloves and insulated shoes, and you don’t mix up your positive and negative lines. I used a quick disconnect connector to make the connection to the outlet.
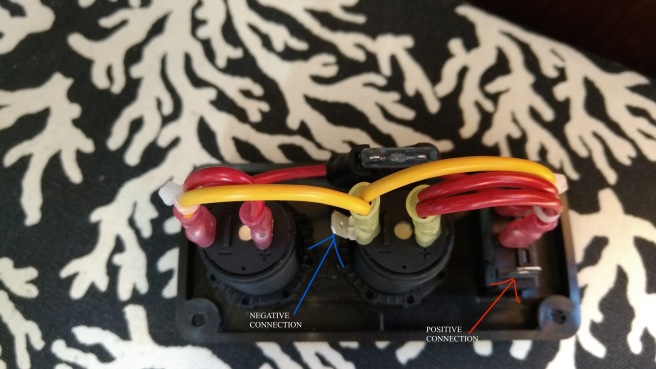
Fig 3: Negative and positive terminals on the outlet 3. Run the positive and negative lines to the battery terminal. I used ring connectors to connect to the battery. I screwed up and got black coated wire instead of more red coated wire, so I used a piece of tape at each end to ensure I didn’t have a chance of mixing the lines up. Don’t be like me. I also had to drill more holes to get to the battery compartment.

Fig 4: Quick connecters and identifying tape at the outlet end 
Fig 5: Not the first to drill holes here
Lessons Learned
- Get the right stuff for the job. While improvising with tape was one solution, it wasn’t the ideal situation in the first place.
- Start with a small diameter drill bit and work to the big one you want. Jumping in with the biggest drill bit because you’re lazy or trying to save time may just result in you seizing your drill up.
- Use a bus bar to connect multiple lines to your battery. Previous owners did not, and I accidentally shorted out my radio when I knocked a ring connector off the battery like the buffoon that I am. This has been added to the Future Projects list.
